HOW TO PLANT A TREE TO HELP THE ENVIRONMENT
On the lookout for a means to produce a wholesome environment near home. Even when you plant only one, it is going to help clean the air, filter water, consume carbon, produce color, give birds a place to construct a nest, enhance the soil, and supply shelter and food for smaller creatures. And that is only the shortlist of many advantages of trees.
Ever since your tree will be around for a lengthy time there are a couple of things to consider prior to you begin planting. The best times to plant a tree would be often in autumn or spring when weather conditions are cool and moist. Decide on a place where your tree will flourish and that you are near so you may see it grow for several years to come.
On the lookout for a means to produce a wholesome environment near home. Even when you plant only one, it is going to help clean the air, filter water, consume carbon, produce color, give birds a place to construct a nest, enhance the soil, and supply shelter and food for smaller creatures. And that is only the shortlist of many advantages of trees.
You may see the regional tree nursery or garden center to discover the very best species and age of this tree to plant according to your climate, soil type, and seed zone. Nursery staff are typically quite educated about this and will help answer any queries.
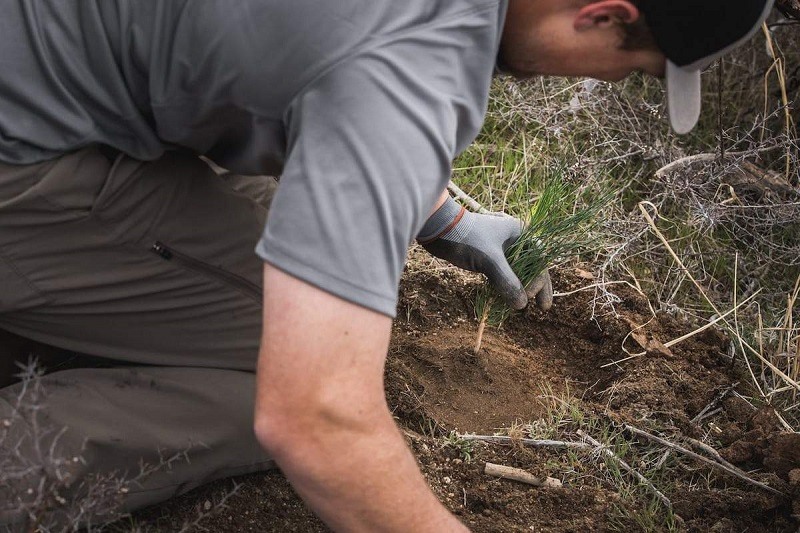
Once you’re ready to plant, here are the basic steps:
Step 1: Dig a hole 3 inches deeper than the length of the roots.
Hint: select a location with great wind protection.
If this is not possible, use nearby objects such as a stone to make a windbreak. And remember: the cooler and shadier, the greater — if you are on a hillside, then be certain you’re putting on the north mountain, so the sapling does not get too much sunlight.
Step 2: Gently remove the tree out of its present container or pot.
Hint: Loosen up the dirt a little bit to assist the roots distribute.
When the roots are thickly jumped and developing in a circular pattern or have started to rise in the form of the container, then your shrub is probably root jump. Should you plant it with no addressing this particular condition, you could be devoting it into a slow death. In the event the matter is intense, you might need to cut an X through the base of the root ball to split this up, but when it is not too bad, just use your hands to split up the routine. Exercise caution, since if you are too rough with all the roots, then you are going to raise the danger of the tree entering transplant shock (a condition of slowed growth and decreased energy after transplanting).
Step 3: Set the seedling into the pit.
Hint: Be sure it’s centered and vertical.
Now is also a fantastic chance to be sure that the hole is the right size. When it’s too heavy, the roots will have a difficult time growing due to a lack of oxygen. And when it is too shallow, they will dry out.
Step 4: Compress the dirt as you fill out the hole.
Hint: pay the entirety of these roots to prevent them from drying out.
Consider this step as producing a “bowl” which is full of water. Taking a little additional care in this measure will help make sure that the origins get sufficient water to perform their job. Consistent compression is crucial to eliminate air pockets and maintain the tree securely in place. Backfill and squeeze in layers before the roots are completely coated, but the back flare remains partially aboveground (the trunk flare is the point where the trunk expands in the bottom of this tree).
Step 5: Build a raised berm to help water drain towards the tree.
Hint: produce a funnel which will permit water to drain towards the shrub.
Now’s the time to perform the tug evaluation: Gently yank the shrub to check the soil is adequately compacted — if you can pull out it, it is not safe enough!
Step 6: Add mulch around the sapling to help with water retention and weeds.
Make sure you leave a baseball-sized perimeter round the stem, since if the mulch is touching the stem, then it may make it rust. But do not let this frighten you off! Done correctly, mulch protects the soil from heavy precipitation and sunlight, which may help prevent water from evaporating off the outside until the tree gets an opportunity to drink.
Step 7: Water your tree to allow it to acclimatize into its new house.
Hint: watering once a week is sufficient to get a walnut tree.
Water will also assist your new tree react to the strain of being transplanted. About a gallon of water ought to be adequate for a little sapling.
You can now go out to the world and plant a few trees. Share your knowledge of friends and instruct them how to plant trees also.